Tuning Google Cartographer to work with a Velodyne HDL-32
The Problem (TL;DR)
I can get Google Cartographer to run in 2D mode, but not 3D. I want to write a .launch and .lua file that will get Cartographer (in 3D mode) to smoothly run over my bagfile.
The Problem (full explanation)
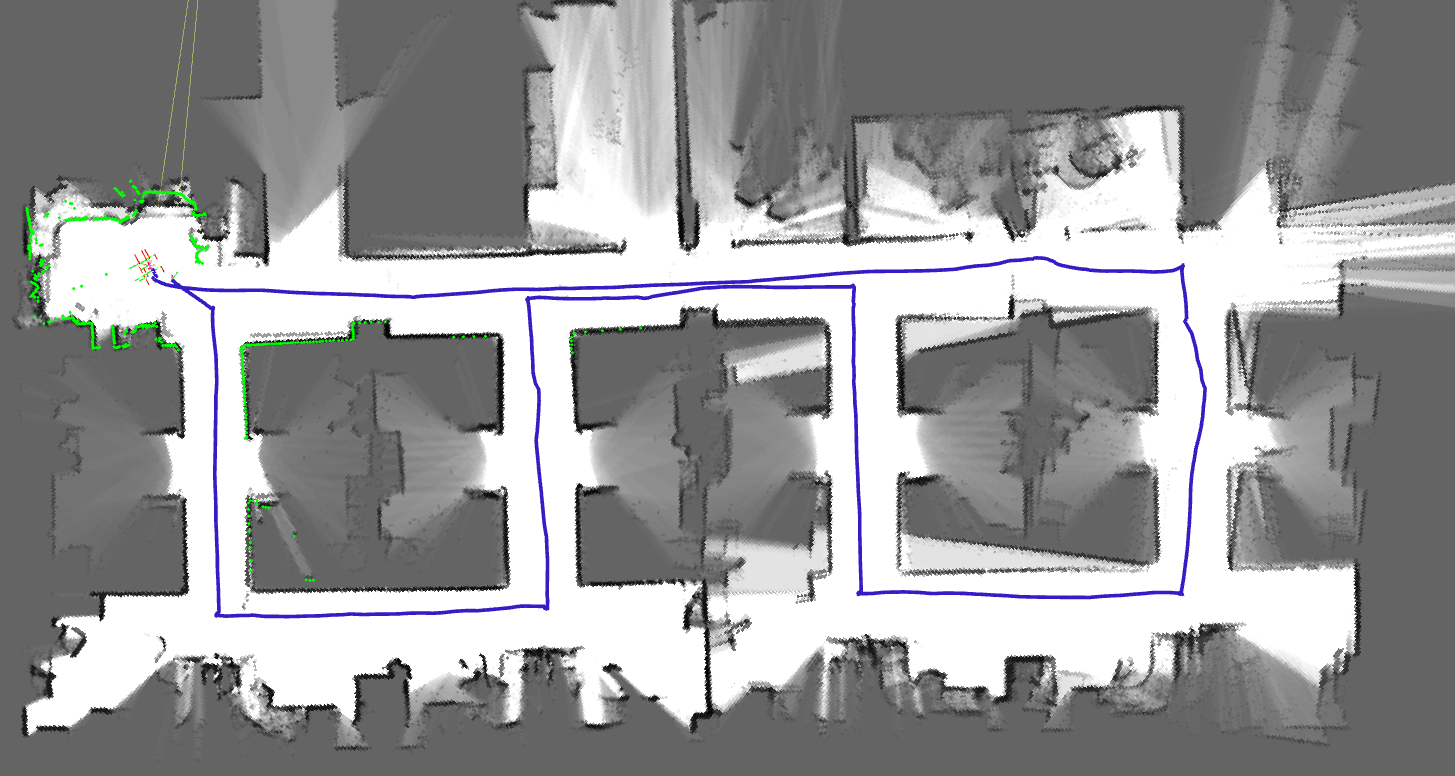
I've got a Velodyne HDL-32 mounted on a Clearpath Jackal UGV, and I'm trying to get Google Cartographer (in 3D mode) working with it. I've collected a short bagfile with all the necessary sensor and TF data, and I can get Cartographer working in 2D mode (see image below).
Completed map from Cartographer (2D): 
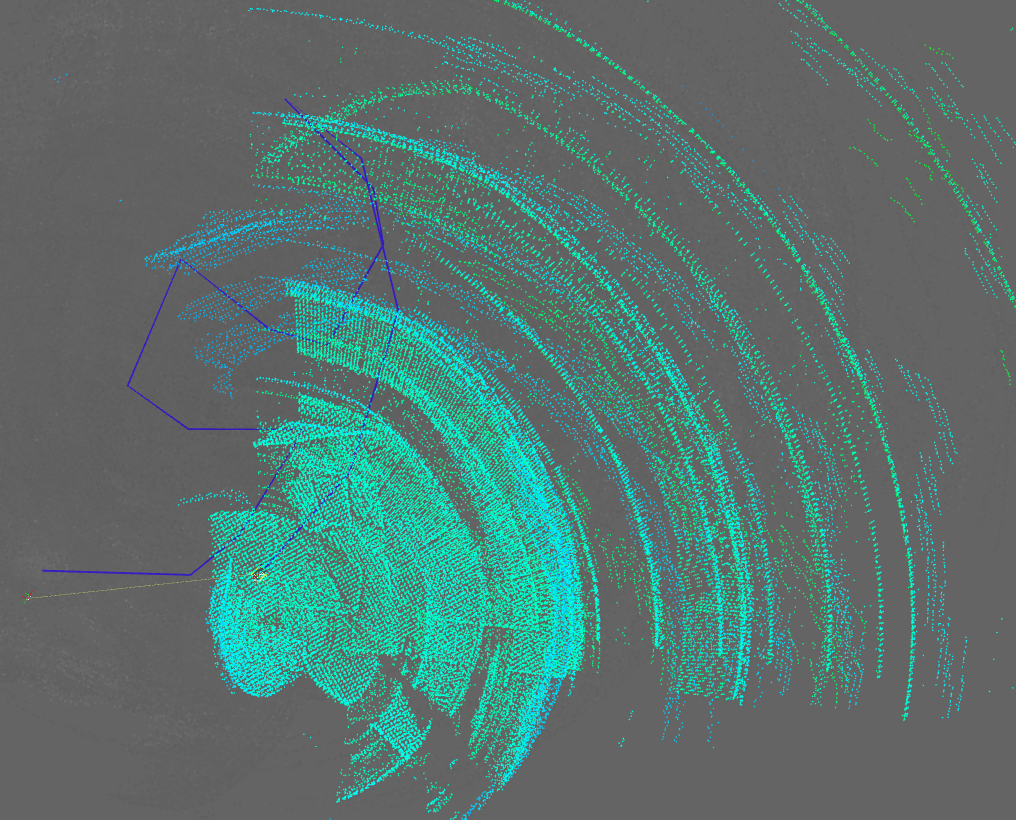
But I can't for the life of me get it working in 3D, mostly because I don't really understand how to tune the myriad of settings Cartographer offers. Unfortunately I haven't found any demo files that use a similar setup (which I could therefore copy). The closest thing is the 3d_demo_packpack.launch and backpack_3d.lua files. However, when I try a modified version of these files, this is what I get:
My best result from Cartographer (3D) 
It looks like the raw data simply isn't being matched properly, and I suspect that fixing this may well be a case of tweaking the right parameters. However, none of the tinkering or tweaking I've done so far has produced anything better than what you see above. Everything under "options={}" in the .lua files is well documented here, and I think I've got those right, but the other parameters aren't documented at all and unfortunately I'm mostly guesstimating at what they do.
I'd like know how to write/configure a set of launch/lua files to get Cartographer working on my system. I suspect that my use case - one UGV and one 3D LiDAR - will be a relatively common as Cartographer grows in popularity. So hopefully any answers or advice here can help others with a similar setup. Thanks in advance for any help or advice anyone can provide. The details of my system are below.
System Information
- OS: Ubuntu 14.04 (laptop), ROS Indigo Igloo (robot)
- Robot: Clearpath Robotics Jackal UGV (real, not simulated)
- Sensors: IMU, wheel encoders, Velodyne HDL-32E
- TF tree: tf_frames
- Working 2D config files: cartographer_2d.launch, cartographer_configuration_2d.lua
- Video example of working 2D Cartographer: cartographer_2d_rviz_output.mp4
- NOT working 3D config files: cartograph_3d.launch, cartographer_configuration_3d.lua
- Sample bagfile: test_data.bag
- Notes: The
/odom->/base_linktransformation is provided by an EKF, courtesy of robot_localization, which fuses IMU and wheel encoder data. The bagfile contains bothPointCloud2data (from the Velodyne drivers) on the/velodyne_pointstopic. It also containsLaserScandata (from the pointcloud_to_laserscan package) on the/scantopic. So in theory the same bagfile can be fed to the 2D or 3D version of Cartographer.
Updates
Update 1
With some help from the developers, I've got a working configuration. The three key parameter changes for me were:
TRAJECTORY_BUILDER_3D.scans_per_accumulation = 1I don't really understand this parameter but it seems to ...


Hey, I am very interested in your integration of Cartographer with the LiDAR data since I am trying to achieve something very similar. Would it be okay if we talked directly on e-mail since I have quite a few questions?
@i_robot_flight: you should ask your questions here (as a question!) so that the entire community can benefit.
All right, thanks!
I've had MUCH better results with the latest release of Cartographer (dunno why). So I suggest you start with that and modify the 3D backpack demo files. I'm trying to update all this but CloudCompare has stopped working on my computer so I can't work with point clouds ATM.
Hi, Matt, How did you implement zero velocity update for imu. I am having a similar problem where my laser readings keep changing the position without moving lidar. Thus, this is giving me multiple submaps in different orientations of the same location.
I can give you the code I used to implement a zero velocity update, but if you're having other problems you're better to post it as its own question.
@Mat that'd be great, if u can can share the code. Thanks.
@RoboRos here's a link: imu_processor. You'll need to install it in a catkin package, compile it and run it using
rosrun <package_name> imu_processor.pyOr just copy the code, it's not particularly well written but it works.