
The site is read-only. Please transition to use Robotics Stack Exchange
| ROS Resources: Documentation | Support | Discussion Forum | Index | Service Status | ros @ Robotics Stack Exchange |
| | 1 | initial version |
Have a look at the ur.urdf.xacro which is loaded by the launch file view_ur.launch.py. There the xacro ur_macro.xacro is included: <xacro:include filename="$(find ur_description)/urdf/ur_macro.xacro"/>.
If you have a look in this file, there you will find the line <link name="${prefix}flange" />. There you can add your custom tool, or e.g. a cylinder, therefore just replace the line by:
<link name="${prefix}flange" >
        <visual>
            <origin xyz="0 0 0" rpy="0 0 0"/>
            <geometry>
                <cylinder length="0.3" radius="0.03"/>
            </geometry>
        </visual>
        <collision>
            <origin xyz="0 0 0" rpy="0 0 0"/>
            <geometry>
                <cylinder length="0.3" radius="0.03"/>
            </geometry>
        </collision>
    </link>
Disclaimer: I did not test the code, there might be a typo, just reach out to me if you are getting stuck.
| | 2 | No.2 Revision |
Have a look at the ur.urdf.xacro which is loaded by the launch file view_ur.launch.py. There the xacro ur_macro.xacro is included: <xacro:include filename="$(find ur_description)/urdf/ur_macro.xacro"/>.
If you have a look in this file, there you will find the line <link name="${prefix}flange" />. There you can add your custom tool, or e.g. a cylinder, therefore just replace the line by:
<link name="${prefix}flange" >
        <visual>
            <origin xyz="0 0 0" rpy="0 0 0"/>
            <geometry>
                <cylinder length="0.3" radius="0.03"/>
            </geometry>
        </visual>
        <collision>
            <origin xyz="0 0 0" rpy="0 0 0"/>
            <geometry>
                <cylinder length="0.3" radius="0.03"/>
            </geometry>
        </collision>
    </link>
To further understand the usage of xacro i can recomend you this tutorial
Disclaimer: I did not test the code, there might be a typo, just reach out to me if you are getting stuck.
| | 3 | No.3 Revision |
If you want to add a tool to your robot, there are a few alternatives.
Changing the URDF Have a look at the ur.urdf.xacro which is loaded by the launch file view_ur.launch.py. There the xacro ur_macro.xacro is included: <xacro:include filename="$(find ur_description)/urdf/ur_macro.xacro"/>.
If you have a look in this file, there you will find the line <link name="${prefix}flange" />. There you can add your custom tool, or e.g. a cylinder, therefore just replace the line by:
<link name="${prefix}flange" >
        <visual>
            <origin xyz="0 0 0" rpy="0 0 0"/>
            <geometry>
                <cylinder length="0.3" radius="0.03"/>
            </geometry>
        </visual>
        <collision>
            <origin xyz="0 0 0" rpy="0 0 0"/>
            <geometry>
                <cylinder length="0.3" radius="0.03"/>
            </geometry>
        </collision>
    </link>
To further understand the usage of xacro i can recomend you this tutorial
Disclaimer: I did not test the code, there might be a typo, just reach out to me if you are getting stuck.
Adding a tool via rviz
In RVIZ click Panels -> MotionPlanning
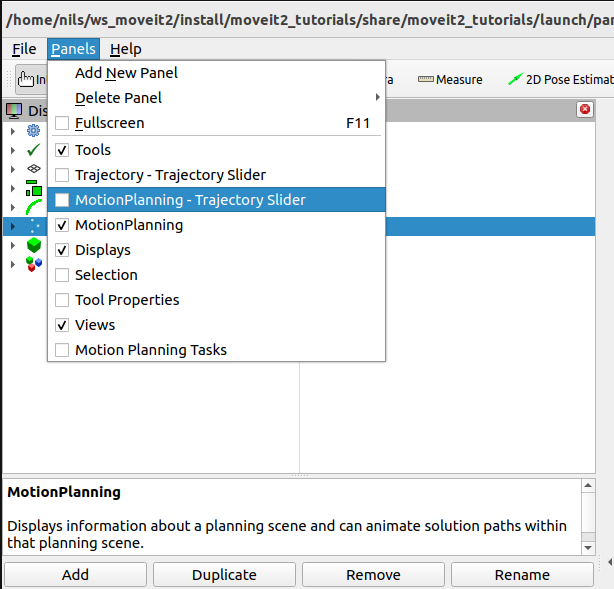
Then you can add a Scene Object, and attach it to the flange.
Adding a tool via code This is described here
| | 4 | No.4 Revision |
If you want to add a tool to your robot, there are a few alternatives.
Changing the URDF
Have a look at the ur.urdf.xacro which is loaded by the launch file view_ur.launch.py. There the xacro ur_macro.xacro is included: <xacro:include filename="$(find ur_description)/urdf/ur_macro.xacro"/>.
If you have a look in this file, there you will find the line <link name="${prefix}flange" />. There you can add your custom tool, or e.g. a cylinder, therefore just replace the line by:
<link name="${prefix}flange" >
        <visual>
            <origin xyz="0 0 0" rpy="0 0 0"/>
            <geometry>
                <cylinder length="0.3" radius="0.03"/>
            </geometry>
        </visual>
        <collision>
            <origin xyz="0 0 0" rpy="0 0 0"/>
            <geometry>
                <cylinder length="0.3" radius="0.03"/>
            </geometry>
        </collision>
    </link>
To further understand the usage of xacro i can recomend you this tutorialDisclaimer: I did not test the code, there might be a typo, just reach out to me if you are getting stuck.
Adding a tool via rviz
In RVIZ click Panels -> MotionPlanning
Then you can add a Scene Object, and attach it to the flange.
Adding a tool via code
This is described here
| | 5 | No.5 Revision |
If you want to add a tool to your robot, there are a few alternatives.
Have a look at the ur.urdf.xacro which is loaded by the launch file view_ur.launch.py. There the xacro ur_macro.xacro is included: <xacro:include filename="$(find ur_description)/urdf/ur_macro.xacro"/>.
If you have a look in this file, there you will find the line <link name="${prefix}flange" />. There you can add your custom tool, or e.g. a cylinder, therefore just replace the line by:
<link name="${prefix}flange" >
        <visual>
            <origin xyz="0 0 0" rpy="0 0 0"/>
            <geometry>
                <cylinder length="0.3" radius="0.03"/>
            </geometry>
        </visual>
        <collision>
            <origin xyz="0 0 0" rpy="0 0 0"/>
            <geometry>
                <cylinder length="0.3" radius="0.03"/>
            </geometry>
        </collision>
    </link>
To further understand the usage of xacro i can recomend you this tutorialDisclaimer: I did not test the code, there might be a typo, just reach out to me if you are getting stuck.
In RVIZ click Panels -> MotionPlanning
Then you can add a Scene Object, and attach it to the flange.
This is described here
| | 6 | No.6 Revision |
If you want to add a tool to your robot, there are a few alternatives.
Have a look at Updated the ur.urdf.xacroanswer based on the comments (thanks to gvdhoorn which is loaded by the launch file view_ur.launch.py. There the xacro ur_macro.xacro is included: ):<xacro:include filename="$(find ur_description)/urdf/ur_macro.xacro"/>.
If you have a look in this file, there you will find the line <link name="${prefix}flange" />. There you can add your custom tool, or e.g. a cylinder, therefore just replace the line by:
<link name="${prefix}flange" >
Create a new package, depend on the
packages which provide the parts you'd like to combine, create a newTo further understand the usage of xacro i can recomend you this tutorialDisclaimer: I did not test the code, there might be a typo, just reach out to me if you are getting stuck.
In RVIZ click Panels -> MotionPlanning
Then you can add a Scene Object, and attach it to the flange.
This is described here
 ROS Answers is licensed under Creative Commons Attribution 3.0 Content on this site is licensed under a Creative Commons Attribution Share Alike 3.0 license.